
/filters:quality(75)/mediadev/media/menu-pics/menu_banner_mobile.png)
/filters:quality(75)/mediadev/media/menu-pics/all-porcelain.jpg)
/filters:quality(75)/mediadev/media/menu-pics/luxury-italian.jpg)
/filters:quality(75)/mediadev/media/menu-pics/premium-italian.jpg)
/filters:quality(75)/mediadev/media/menu-pics/budget-porcelain.jpg)
/filters:quality(75)/mediadev/media/menu-pics/large-format-porcelain.jpg)
/filters:quality(75)/mediadev/media/menu-pics/wood-effect-porcelain.jpg)
/filters:quality(75)/mediadev/media/menu-pics/porcelain-planks.jpg)
/filters:quality(75)/mediadev/media/menu-pics/porcelain-setts.jpg)
/filters:quality(75)/mediadev/media/menu-pics/browse-all-paving.jpg)
/filters:quality(75)/mediadev/media/menu-pics/driveway-paving.jpg)
/filters:quality(75)/mediadev/media/menu-pics/interior-tiles.jpg)
/filters:quality(75)/mediadev/media/menu-pics/stone-effect-porcelain.png)
/filters:quality(75)/mediadev/media/menu-pics/wood-effect-porcelain.png)
/filters:quality(75)/mediadev/media/menu-pics/grey-porcelain.png)
/filters:quality(75)/mediadev/media/menu-pics/beige-porcelain.png)
/filters:quality(75)/mediadev/media/menu-pics/dark-porcelain.png)
/filters:quality(75)/mediadev/media/menu-pics/light-porcelain.png)
/filters:quality(75)/mediadev/media/menu-pics/patio-grout.jpg)
/filters:quality(75)/mediadev/media/menu-pics/primers.jpg)
/filters:quality(75)/mediadev/media/menu-pics/porcelain-blades.jpg)
/filters:quality(75)/mediadev/media/menu-pics/pedestals.jpg)
/filters:quality(90)/mediadev/media/menu-pics/drainage.jpg)
/filters:quality(90)/mediadev/media/menu-pics/cleaners.jpg)
/filters:quality(75)/mediadev/media/menu-pics/all-stone-paving.jpg)
/filters:quality(75)/mediadev/media/menu-pics/all-sawn-paving.jpg)
/filters:quality(75)/mediadev/media/menu-pics/all-riven-paving.jpg)
/filters:quality(75)/mediadev/media/menu-pics/indian-sandstone.jpg)
/filters:quality(75)/mediadev/media/menu-pics/limestone-paving.jpg)
/filters:quality(75)/mediadev/media/menu-pics/granite-paving.jpg)
/filters:quality(75)/mediadev/media/menu-pics/slate-paving.jpg)
/filters:quality(75)/mediadev/media/menu-pics/yorkstone-paving.jpg)
/filters:quality(75)/mediadev/media/menu-pics/portland.jpg)
/filters:quality(75)/mediadev/media/menu-pics/stone-pavers.jpg)
/filters:quality(75)/mediadev/media/menu-pics/cobbles-setts.jpg)
/filters:quality(75)/mediadev/media/menu-pics/plank-paving.jpg)
/filters:quality(75)/mediadev/media/menu-pics/paving-circles.jpg)
/filters:quality(75)/mediadev/media/menu-pics/bespoke-paving-1.jpg)
/filters:quality(75)/mediadev/media/menu-pics/edging-stones-1.jpg)
/filters:quality(75)/mediadev/media/menu-pics/prestige-stone.jpg)
/filters:quality(75)/mediadev/media/menu-pics/grey-blue-stone.png)
/filters:quality(75)/mediadev/media/menu-pics/swatch-black-dark.jpg)
/filters:quality(75)/mediadev/media/menu-pics/swatch-buff-beige-white.jpg)
/filters:quality(90)/mediadev/media/menu-pics/sealants.jpg)
/filters:quality(75)/mediadev/media/menu-pics/all-clay-paving.jpg)
/filters:quality(75)/mediadev/media/menu-pics/alpha-clay-pavers.jpg)
/filters:quality(75)/mediadev/media/menu-pics/cottage-garden-clay-pavers.jpg)
/filters:quality(75)/mediadev/media/menu-pics/kessel-garden-clay-pavers.jpg)
/filters:quality(75)/mediadev/media/menu-pics/artisan-clay-pavers.jpg)
/filters:quality(75)/mediadev/media/menu-pics/grey-blue-clay-paver.png)
/filters:quality(75)/mediadev/media/menu-pics/red-brown-clay-pavers.png)
/filters:quality(75)/mediadev/media/menu-pics/beige-buff-clay-pavers.png)
/filters:quality(75)/mediadev/media/menu-pics/composite-decking.jpg)
/filters:quality(75)/mediadev/media/menu-pics/designboard-decking.jpg)
/filters:quality(75)/mediadev/media/menu-pics/classic-designboard.jpg)
/filters:quality(75)/mediadev/media/menu-pics/brushed-designboard.jpg)
/filters:quality(75)/mediadev/media/menu-pics/grooved-designboard.jpg)
/filters:quality(75)/mediadev/media/menu-pics/millboard-decking.jpg)
/filters:quality(75)/mediadev/media/menu-pics/grey-decking.jpg)
/filters:quality(75)/mediadev/media/menu-pics/black-charcoal-decking.jpg)
/filters:quality(75)/mediadev/media/menu-pics/brown-decking.jpg)
/filters:quality(75)/mediadev/media/menu-pics/all-build-deck.png)
/filters:quality(75)/mediadev/media/menu-pics/all-vertical.jpg)
/filters:quality(75)/mediadev/media/menu-pics/luxury-designclad.jpg)
/filters:quality(75)/mediadev/media/menu-pics/stone-cladding.jpg)
/filters:quality(75)/mediadev/media/menu-pics/all-garden-walling-1.jpg)
/filters:quality(75)/mediadev/media/menu-pics/facing-bricks.jpg)
/filters:quality(75)/mediadev/media/menu-pics/garden-screening.jpg)
/filters:quality(75)/mediadev/media/menu-pics/menu_Garden_banner_desk.png)
/filters:quality(75)/mediadev/media/menu-pics/all-steps-coping.jpg)
/filters:quality(75)/mediadev/media/menu-pics/stone-garden-steps.jpg)
/filters:quality(75)/mediadev/media/menu-pics/sawn-steps.jpg)
/filters:quality(75)/mediadev/media/menu-pics/riven-steps.jpg)
/filters:quality(75)/mediadev/media/menu-pics/yorkstone-steps.jpg)
/filters:quality(75)/mediadev/media/menu-pics/bespoke-steps.jpg)
/filters:quality(75)/mediadev/media/menu-pics/porcelain-steps.jpg)
/filters:quality(75)/mediadev/media/menu-pics/off-the-shelf.jpg)
/filters:quality(75)/mediadev/media/menu-pics/stone-coping.jpg)
/filters:quality(75)/mediadev/media/menu-pics/sawn-coping.jpg)
/filters:quality(75)/mediadev/media/menu-pics/riven-coping.jpg)
/filters:quality(75)/mediadev/media/menu-pics/yorkstone-coping.jpg)
/filters:quality(75)/mediadev/media/menu-pics/bespoke-coping.jpg)
/filters:quality(75)/mediadev/media/menu-pics/stone-pier-caps.jpg)
/filters:quality(75)/mediadev/media/menu-pics/porcelain-coping.jpg)
/filters:quality(75)/mediadev/media/menu-pics/all-bespoke-services.jpg)
/filters:quality(75)/mediadev/media/menu-pics/bespoke-paving-2.jpg)
/filters:quality(75)/mediadev/media/menu-pics/bespoke-steps-1.jpg)
/filters:quality(75)/mediadev/media/menu-pics/bespoke-coping-1.jpg)
/filters:quality(75)/mediadev/media/menu-pics/edge-profiles.jpg)
/filters:quality(75)/mediadev/media/menu-pics/masonry-services.jpg)
/filters:quality(75)/mediadev/media/menu-pics/deluxe-pergolas.jpg)
/filters:quality(75)/mediadev/media/menu-pics/proteus-pergolas.jpg)
/filters:quality(75)/mediadev/media/menu-pics/corten_planter_menu.png)
 Trade Discount Available
 FREE Nationwide Delivery
 Nationwide Showrooms
 Live Stock Levels
 Split Packs Available
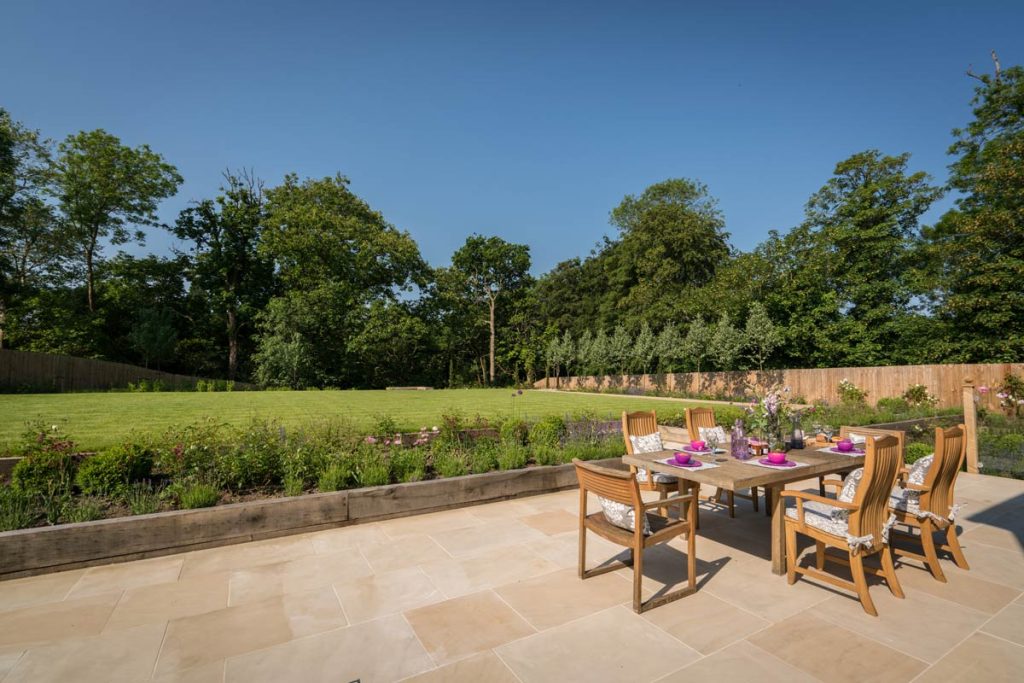
You’ve made the decision to seal your porcelain or natural stone patio, and now you’d like to know how. Read on…
The first question to ask is not how, but when? The decision will make a big impact, not only on the effectiveness of the patio stone sealer in the coming years, but also the look of your patio from the moment you apply it.
When is the best time to apply stone sealant?
Without a doubt, the best time to apply sealant is before the stone is laid. This is because it can then be applied in ideal conditions, ensuring it will do a lasting job for years to come.
Delivered pre-sealed
From your point of view, the easiest approach is to have your paving slabs delivered pre-sealed.
We unpack the stone indoors in a clean, dry environment. We have the facilities to apply it in controlled conditions, and the space to store it to allow it to dry thoroughly before we repack it. We’ve also been sealing stone for years; our experts know how to get the best results and when it’s taken.
This means the stone is ready to lay immediately it's delivered, and it’ll be easier to keep the slabs clean while you’re pointing, as any mortar that gets on the surface will clean off more easily.
Seal it onsite prior to laying
This is the next best option, if you have the facilities to allow it. Paving sealer needs to be applied in clean, dry conditions and, ideally, that means indoors. You’ll need space to unpack the stone, to move it around while you’re sealing, and space to store it for at least six to eight hours in the dry, while it dries. You also need to be confident that you can follow the sealing instructions to the letter.
It’s important not to lay slabs before the patio stone sealant is ready, as doing that too soon can result in a patchy finish and visible fingerprints.
Only apply patio sealant to the top surface
The sides and bottom of paving slabs should not be sealed. It’s a complete waste of money to seal the bottom, as it doesn’t afford any additional protection to the stone.
It is likely to create problems too. Patio sealant prevents a seal being formed with the cement bed on which the stone is laid, making it more likely that slabs will become loose. Discover the one time we advised sealing the underside of paving.
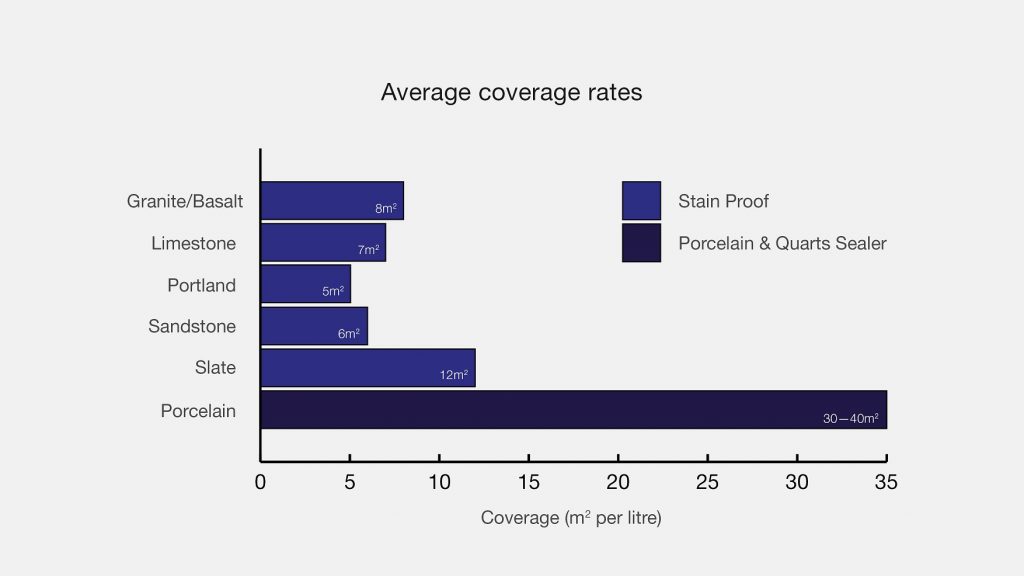
For an indication of how much sealant you’ll need, depending on your natural stone or porcelain paving, see the graph in the How Much Sealant Do You Need section below.
When to apply stone sealer if the paving is already laid
Sometimes, though, it’s just not possible to apply sealant before laying. Or perhaps you’re sealing a patio that has been down for some time. The following points will help you get the best result.
When the stone is clean
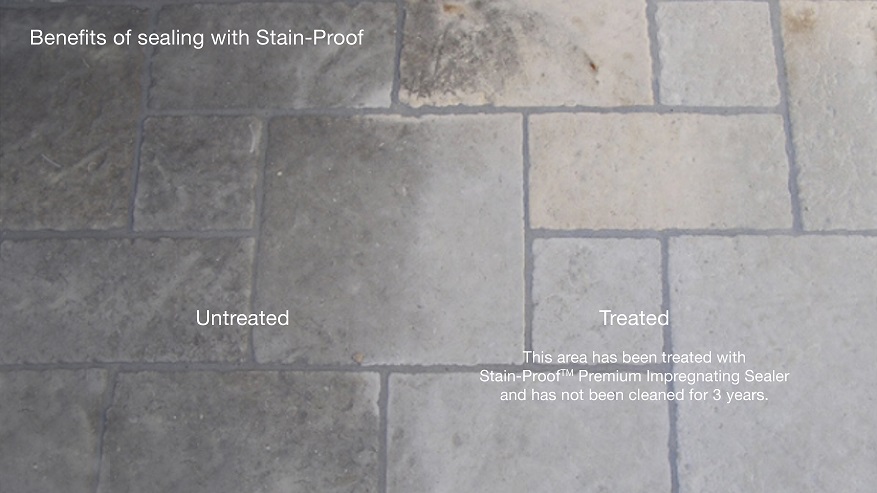
The rule is that you only seal stone that looks the way you want it to once it’s sealed. Sealant doesn’t make marks magically disappear.
It does, however, make them much harder to clean off. This is because they are now under a cosy layer of sealant which repels liquids. If you do manage to clean off pre-existing marks after sealing, you may need to apply more sealant. This is because the dirt might have shielded the stone beneath from the sealant and left a vulnerable area with its removal.
So, first rule: only apply sealant to clean stone. Clean the stone before sealing, if necessary.
When the weather is good
There’s no skimping on this step, no thinking a couple of hours of dry weather will be enough. It’s certainly not a winter job. Some years, it’s not even a summer one!
You must wait for a period of warm, dry weather that will last long enough for the job to be done. Patio slab sealers .shouldn’t be applied when the temperature is below 5°C or over 35°C.
The sealant becomes generally weather-proof in six to eight hours. However, torrential rain in the coming month runs the risk of compromising the sealant’s effectiveness, just as jetwashing would during that period (see below).
What happens when you seal in wet weather
It depends how wet the paving gets after sealing. If it gets saturated, then there’s a good chance you’ll have to go through the whole sealing process again, from the beginning.
However, even a light shower after, say, four hours of the sealant being applied might mean that you need to put down another coat once the weather dries up.
Avoid sealing during efflorescence
Efflorescence is a naturally occurring phenomenon. It shows as white cloudy marks appearing on the surface of paving and is the result of salts migrating from within the stone itself or up through the stone from the bedding layer. It’s temporary and the marks will disappear on their own, though in some cases this can take a few months.
The good news is that efflorescence is not something that happens often, and that sealing the stone will help prevent it from appearing, because water cannot reach the surface from below.
However, if it does, it’s important not to seal the stone while it’s visible. If you do, you risk sealing the white marks into the stone for good.
Do I need to wait to seal after laying?
You’ll sometimes see the recommendation to leave a newly laid patio for several weeks – usually up to 12 weeks, though some people suggest six months. This is allow any efflorescence to appear, and is recommended for some sealers.
However, because of the way Dry Treat works, if the stone is clean and dry, you can apply it immediately.
How to seal your patio
Choice of Sealant

At London Stone we’ve tested out a wide range of sealants for paving slabs over the years, to ensure that we only supply products that we’re happy with, and are confident that you’ll find effective. Because of this, all the information here is related to using the patio sealants we stock. Always check the manufacturer’s instructions.
See A quick guide to choosing the best stone sealant for more information.
How much sealant do you need?
This depends on the stone being sealed. The more porous the paving, the more sealant it will soak up. Here’s an indication of how much you’re likely to require, based on the paving material.
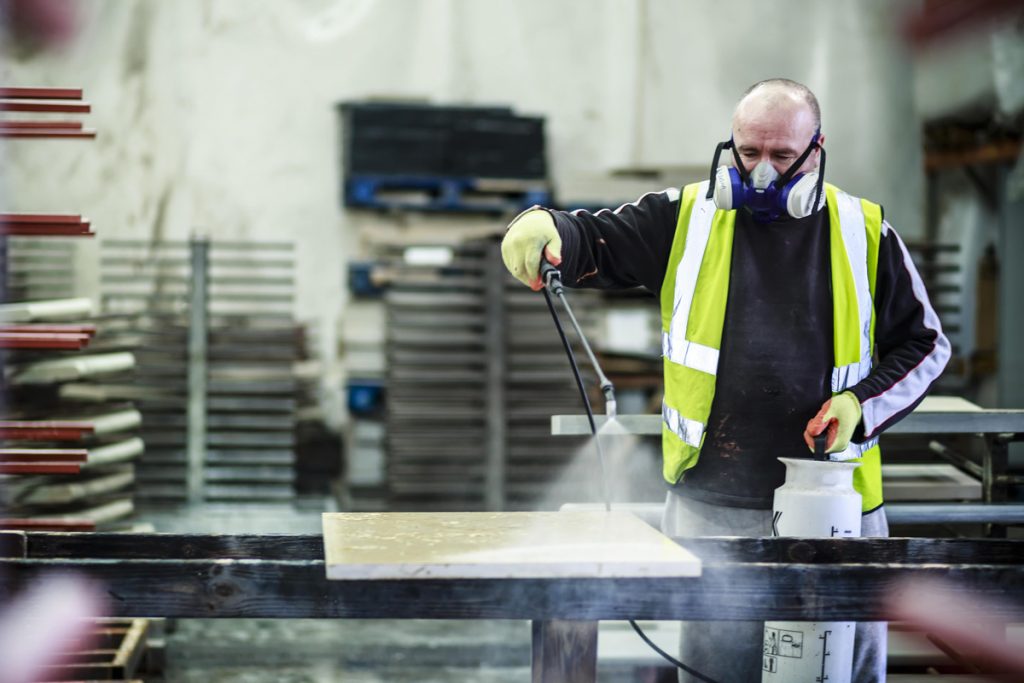
Equipment for sealing paving slabs
So, the stone is laid. It’s clean, and the weather is set fair. You can apply the stone sealer in two different ways. Either way, you should equip yourself with protective gloves and goggles, and a mask to avoid breathing in the chemicals.
Depending on where the patio is, you’ll also need cardboard sheets and painters’ masking tape.
We recommend using a low-pressure sprayer. It’s easier to achieve even coverage, easier to judge how much you're using as you go along, so that the sealant goes further. It’s also the preferred application method for rougher surfaces, such as riven stone, as it’s likely to reach all angles.
However, you can also brush patio sealer on, and this works well for smooth surfaces, such as sawn sandstone. The best implement for this is a lambswool applicator. You’ll also need a paint tray so you can dip the brush into the sealant.
Protect plants and walls
Shield plants from spray. Cardboard sheets are useful for this.
Also protect the base of walls where they meet the paving. Painters' masking tape is ideal for this—just make sure you get a good quality one so that it’s easy to remove afterwards.
Apply first coat
Start applying from the furthest edge and work backwards, so you can avoid too much walking on the area you’ve sprayed. You can walk on sprayed areas, with shoe protectors on, but obviously the less time you spend on the treated areas, the better.
For a straightforward explanation of how to apply sealant with a lambswool floor finisher, watch Applying Stain-Proof Original.
Apply second coat
Once the first coat is just touch-dry (around 10 minutes), apply a second coat. Applying it at 90 degrees to the first minimises the chance of missing a spot.
Allow the second coat to stand for ten minutes.
Clean off excess
This is an extremely important step.
It’s tempting when you’ve spent a lot of money on a sealant to assume the more that goes on, the better. Not so.
Once the stone is completely saturated with the solution, it can’t absorb any more. Excess sealant won’t be absorbed and must be wiped off after the recommended time. If you don’t wipe it off properly, it will evaporate into sticky, shiny patches which, at best, will take much elbow grease to remove or, at worst, if left too long, will be impossible to remove at all.
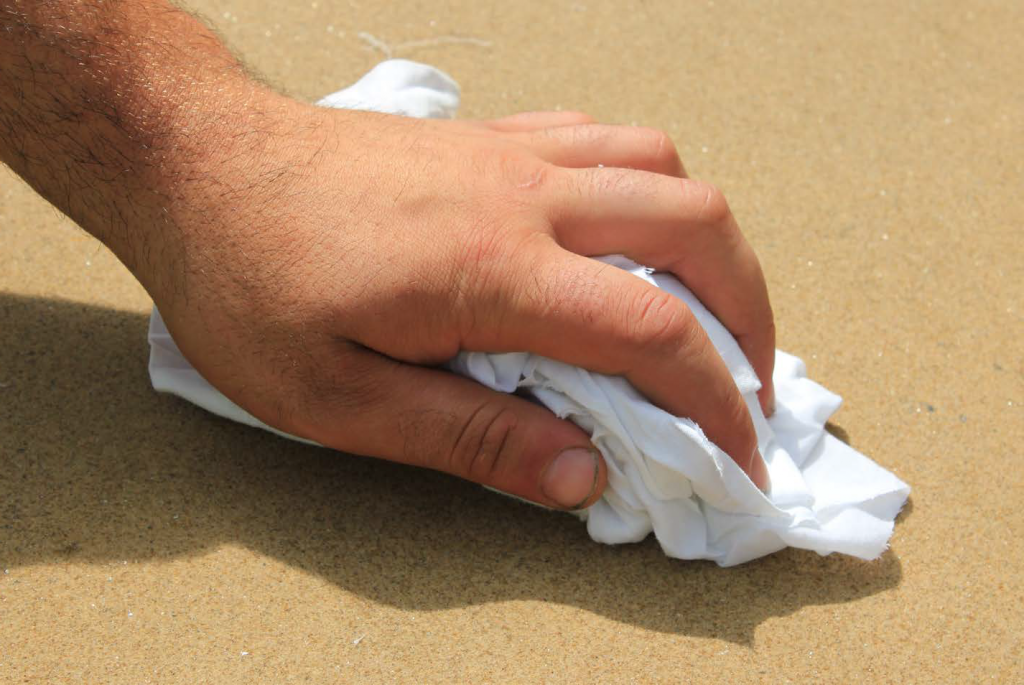
Removing excess can be done in part (as demonstrated in the Stain Proof video) by standing on cloths and sliding them over the surface as you shuffle across it. Use white cloths as the alcohol in the sealant could draw dye from the material and stain the paving.
By the time you’ve finished, the surface should be totally clean and dry, to the extent that a white cloth rubbed over it remains unmarked.
Allow stone sealant to dry
The sealant is weather-proof within about six to eight hours. Although you can walk on it with shoe protectors while applying, it shouldn’t then be walked on as a matter of course for twenty-four hours.
However, the full curing time is thirty days. See our extensive FAQ page on sealing paving slabs to find out how this affects cleaning, as well as answers to numerous other queries.
For tips on applying sealer yourself, read our DIY tips on how to seal paving like a professional.
Post updated: June 2023
