/filters:quality(75)/mediadev/media/menu-pics/menu_banner_mobile.png)
/filters:quality(75)/mediadev/media/menu-pics/all-porcelain.jpg)
/filters:quality(75)/mediadev/media/menu-pics/luxury-italian.jpg)
/filters:quality(75)/mediadev/media/menu-pics/premium-italian.jpg)
/filters:quality(75)/mediadev/media/menu-pics/budget-porcelain.jpg)
/filters:quality(75)/mediadev/media/menu-pics/large-format-porcelain.jpg)
/filters:quality(75)/mediadev/media/menu-pics/wood-effect-porcelain.jpg)
/filters:quality(75)/mediadev/media/menu-pics/porcelain-planks.jpg)
/filters:quality(75)/mediadev/media/menu-pics/porcelain-setts.jpg)
/filters:quality(75)/mediadev/media/menu-pics/browse-all-paving.jpg)
/filters:quality(75)/mediadev/media/menu-pics/driveway-paving.jpg)
/filters:quality(75)/mediadev/media/menu-pics/interior-tiles.jpg)
/filters:quality(75)/mediadev/media/menu-pics/stone-effect-porcelain.png)
/filters:quality(75)/mediadev/media/menu-pics/wood-effect-porcelain.png)
/filters:quality(75)/mediadev/media/menu-pics/grey-porcelain.png)
/filters:quality(75)/mediadev/media/menu-pics/beige-porcelain.png)
/filters:quality(75)/mediadev/media/menu-pics/dark-porcelain.png)
/filters:quality(75)/mediadev/media/menu-pics/light-porcelain.png)
/filters:quality(75)/mediadev/media/menu-pics/patio-grout.jpg)
/filters:quality(75)/mediadev/media/menu-pics/primers.jpg)
/filters:quality(75)/mediadev/media/menu-pics/porcelain-blades.jpg)
/filters:quality(75)/mediadev/media/menu-pics/pedestals.jpg)
/filters:quality(90)/mediadev/media/menu-pics/drainage.jpg)
/filters:quality(90)/mediadev/media/menu-pics/cleaners.jpg)
/filters:quality(75)/mediadev/media/menu-pics/all-stone-paving.jpg)
/filters:quality(75)/mediadev/media/menu-pics/all-sawn-paving.jpg)
/filters:quality(75)/mediadev/media/menu-pics/all-riven-paving.jpg)
/filters:quality(75)/mediadev/media/menu-pics/indian-sandstone.jpg)
/filters:quality(75)/mediadev/media/menu-pics/limestone-paving.jpg)
/filters:quality(75)/mediadev/media/menu-pics/granite-paving.jpg)
/filters:quality(75)/mediadev/media/menu-pics/slate-paving.jpg)
/filters:quality(75)/mediadev/media/menu-pics/yorkstone-paving.jpg)
/filters:quality(75)/mediadev/media/menu-pics/portland.jpg)
/filters:quality(75)/mediadev/media/menu-pics/stone-pavers.jpg)
/filters:quality(75)/mediadev/media/menu-pics/cobbles-setts.jpg)
/filters:quality(75)/mediadev/media/menu-pics/plank-paving.jpg)
/filters:quality(75)/mediadev/media/menu-pics/paving-circles.jpg)
/filters:quality(75)/mediadev/media/menu-pics/bespoke-paving-1.jpg)
/filters:quality(75)/mediadev/media/menu-pics/edging-stones-1.jpg)
/filters:quality(75)/mediadev/media/menu-pics/prestige-stone.jpg)
/filters:quality(75)/mediadev/media/menu-pics/grey-blue-stone.png)
/filters:quality(75)/mediadev/media/menu-pics/swatch-black-dark.jpg)
/filters:quality(75)/mediadev/media/menu-pics/swatch-buff-beige-white.jpg)
/filters:quality(90)/mediadev/media/menu-pics/sealants.jpg)
/filters:quality(75)/mediadev/media/menu-pics/all-clay-paving.jpg)
/filters:quality(75)/mediadev/media/menu-pics/alpha-clay-pavers.jpg)
/filters:quality(75)/mediadev/media/menu-pics/cottage-garden-clay-pavers.jpg)
/filters:quality(75)/mediadev/media/menu-pics/kessel-garden-clay-pavers.jpg)
/filters:quality(75)/mediadev/media/menu-pics/artisan-clay-pavers.jpg)
/filters:quality(75)/mediadev/media/menu-pics/grey-blue-clay-paver.png)
/filters:quality(75)/mediadev/media/menu-pics/red-brown-clay-pavers.png)
/filters:quality(75)/mediadev/media/menu-pics/beige-buff-clay-pavers.png)
/filters:quality(75)/mediadev/media/menu-pics/composite-decking.jpg)
/filters:quality(75)/mediadev/media/menu-pics/designboard-decking.jpg)
/filters:quality(75)/mediadev/media/menu-pics/classic-designboard.jpg)
/filters:quality(75)/mediadev/media/menu-pics/brushed-designboard.jpg)
/filters:quality(75)/mediadev/media/menu-pics/grooved-designboard.jpg)
/filters:quality(75)/mediadev/media/menu-pics/millboard-decking.jpg)
/filters:quality(75)/mediadev/media/menu-pics/grey-decking.jpg)
/filters:quality(75)/mediadev/media/menu-pics/black-charcoal-decking.jpg)
/filters:quality(75)/mediadev/media/menu-pics/brown-decking.jpg)
/filters:quality(75)/mediadev/media/menu-pics/all-build-deck.png)
/filters:quality(75)/mediadev/media/menu-pics/all-vertical.jpg)
/filters:quality(75)/mediadev/media/menu-pics/luxury-designclad.jpg)
/filters:quality(75)/mediadev/media/menu-pics/stone-cladding.jpg)
/filters:quality(75)/mediadev/media/menu-pics/all-garden-walling-1.jpg)
/filters:quality(75)/mediadev/media/menu-pics/facing-bricks.jpg)
/filters:quality(75)/mediadev/media/menu-pics/garden-screening.jpg)
/filters:quality(75)/mediadev/media/menu-pics/menu_Garden_banner_desk.png)
/filters:quality(75)/mediadev/media/menu-pics/all-steps-coping.jpg)
/filters:quality(75)/mediadev/media/menu-pics/stone-garden-steps.jpg)
/filters:quality(75)/mediadev/media/menu-pics/sawn-steps.jpg)
/filters:quality(75)/mediadev/media/menu-pics/riven-steps.jpg)
/filters:quality(75)/mediadev/media/menu-pics/yorkstone-steps.jpg)
/filters:quality(75)/mediadev/media/menu-pics/bespoke-steps.jpg)
/filters:quality(75)/mediadev/media/menu-pics/porcelain-steps.jpg)
/filters:quality(75)/mediadev/media/menu-pics/off-the-shelf.jpg)
/filters:quality(75)/mediadev/media/menu-pics/stone-coping.jpg)
/filters:quality(75)/mediadev/media/menu-pics/sawn-coping.jpg)
/filters:quality(75)/mediadev/media/menu-pics/riven-coping.jpg)
/filters:quality(75)/mediadev/media/menu-pics/yorkstone-coping.jpg)
/filters:quality(75)/mediadev/media/menu-pics/bespoke-coping.jpg)
/filters:quality(75)/mediadev/media/menu-pics/stone-pier-caps.jpg)
/filters:quality(75)/mediadev/media/menu-pics/porcelain-coping.jpg)
/filters:quality(75)/mediadev/media/menu-pics/all-bespoke-services.jpg)
/filters:quality(75)/mediadev/media/menu-pics/bespoke-paving-2.jpg)
/filters:quality(75)/mediadev/media/menu-pics/bespoke-steps-1.jpg)
/filters:quality(75)/mediadev/media/menu-pics/bespoke-coping-1.jpg)
/filters:quality(75)/mediadev/media/menu-pics/edge-profiles.jpg)
/filters:quality(75)/mediadev/media/menu-pics/masonry-services.jpg)
/filters:quality(75)/mediadev/media/menu-pics/deluxe-pergolas.jpg)
/filters:quality(75)/mediadev/media/menu-pics/proteus-pergolas.jpg)
/filters:quality(75)/mediadev/media/menu-pics/corten_planter_menu.png)
 Trade Discount Available
 FREE Nationwide Delivery
 Nationwide Showrooms
 Live Stock Levels
 Split Packs Available
Get prepared with our spring gardening tips.
Spring is the ideal time to slip on your gardening gloves on and get into your garden. Springtime has the perfect conditions for growing plants: water, light, and warmth. With plenty of showers and longer days, it is the right time to give your flower beds a little tidy-up.

Before you begin planting
It can be tempting to go straight in with your new plants, but before you start planting you should take some time to prepare your garden. Clean up any debris and get rid of any weeds. Once you have tidied up a bit, you should look to revitalize your soil. Add an organic material like compost or manure to improve soil structure and add nutrients.
Any old perennials that have made it through the winter need to be pruned to make room for new growth that will come through in the spring months. You should now consider adding mulch to your flower beds, along with the fertilizers and organic materials you have already added. You are now ready to start planting your new plants.
New planting
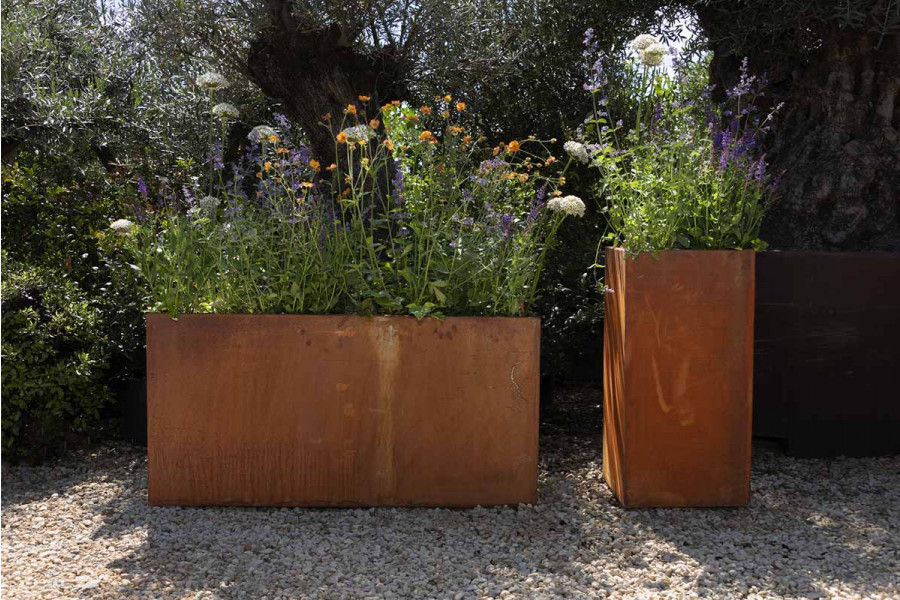
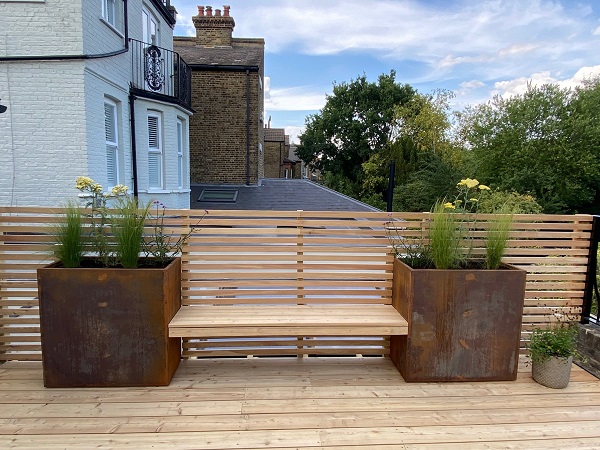
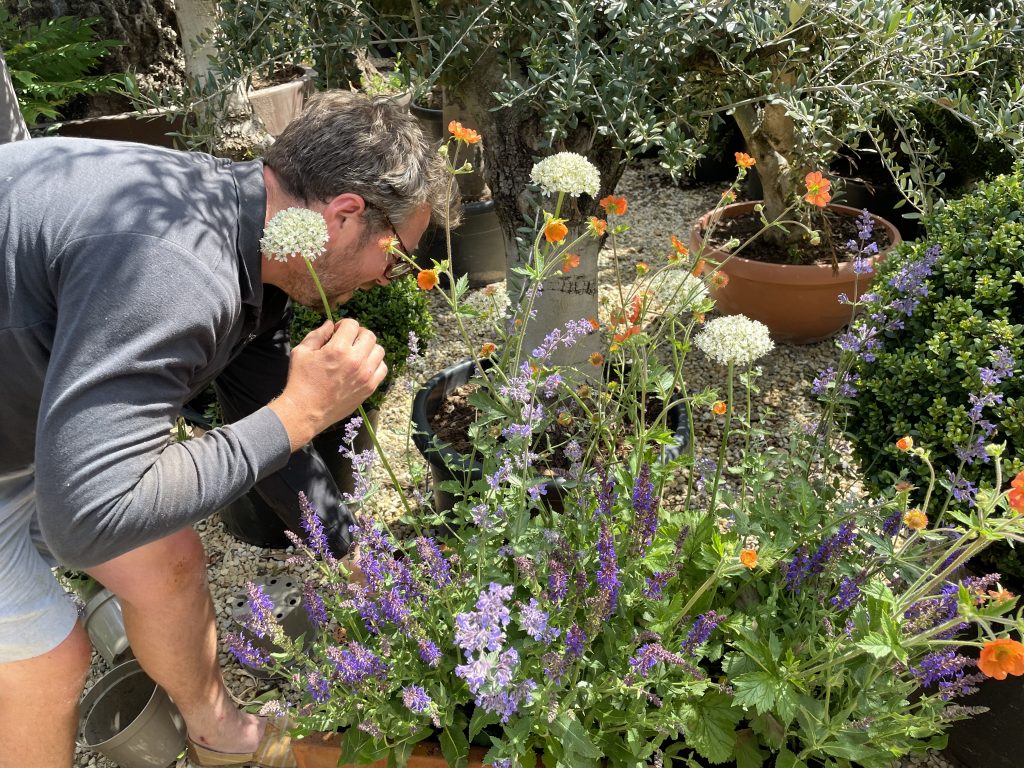
Once your garden is in top shape, you can now turn your attention to new planting. To be sure that we have got the best information for you on planting new flowers we spoke to our friends at Form Plants. Award-winning designer Jamie Butterworth gave us his top planting tips. This guide is for planting into our Corten Steel Planters - in particular, the trough planter.
What you will need
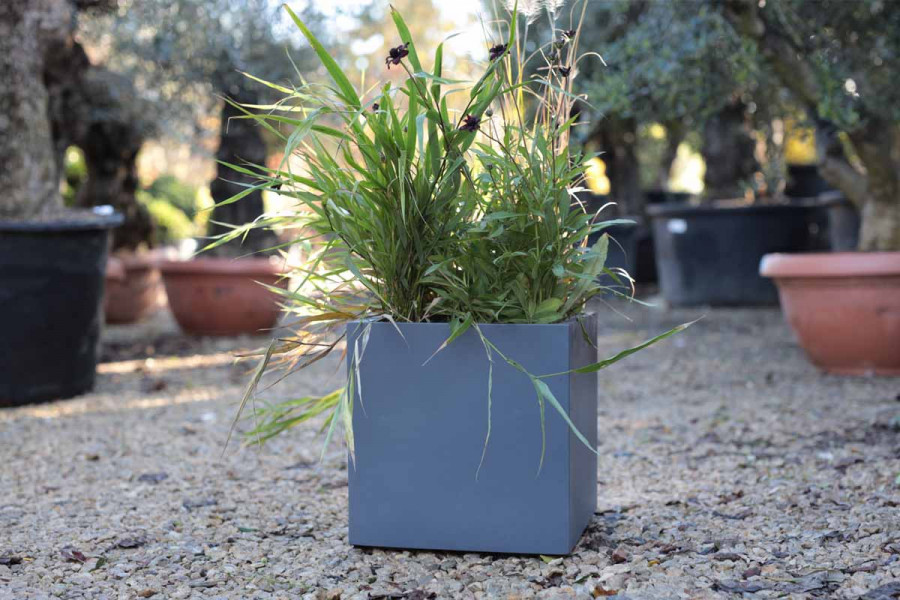
- Your planter of choice; we used our corten steel trough planters.
- Leca® growing medium.
- Peat-free compost. We used Dalefoot Wool Compost for Potting.
- Your choice of plants; Geum ‘Totally Tangerine’, Nepeta racemosa ‘Walker’s Low’, Salvia x sylvestris ‘Mainacht’, Allium nigrum were used in our planters.
Watch this video for a quick how to planting guide before you read on.
Before you start
Check that your plant pot has adequate drainage. You are looking for either existing holes in the bottom of your planter or removable plugs. You may want to consider placing a saucer under the planter to catch any overspills. This is particularly important if your planter will be kept inside. It is key to allow water to safely drain out of your planter to avoid your plants getting root rot. You can position your planter onto pot-feet, rubber mats or allow water to drain into a reservoir to allow water to drain effectively.
Finally, before you start filling the planter, position it in its final location. This is particularly important if you are using large planters. Once filled, the planter will become heavy and difficult to move. It will be far easier for you to begin filling the planter when it is already sitting in its intended location.
Leca® soil
Now that your planter is positioned and has adequate drainage, you can start filling. Leca® soil is the first thing that you will be putting into your planter. This is a growing medium made from lightweight baked clay pebbles. Leca® will provide additional drainage for your pot, allowing water to pass through, avoiding water build-up in the soil and potential root rot for your plants. Fill the planter with Leca® up to around 30cm from the surface of the pot. If you are using the same size planter as we did, then you will likely require one full 50-litre bag.
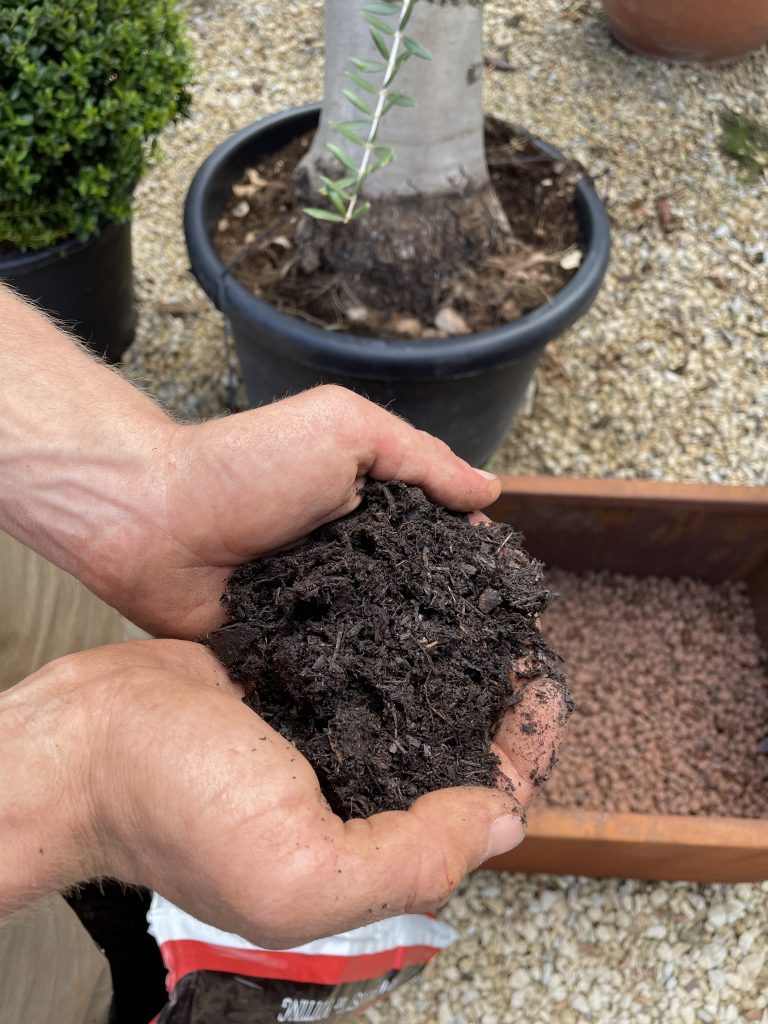
Peat-free compost
Next to go into your planter is the peat-free compost. You will be filling the remainder of your planter with the compost, up to about 2.5cm from the top. As you fill, break up any clumps of compost that you see. We used around one and a half bags of the peat-free compost. Peat-free compost is a good choice for the environmentally conscious. Peat-free helps to reduce the amount of carbon in the atmosphere and tackles climate change.
Plants
Once your planter is filled with the growing medium and compost you are ready to start planting. Jamie planted us a beautiful combination of perennials that will come back every year. He used bee- and wildlife-friendly plants, in an early summer colour-palette to create an impressive, vibrant planter. The plants used were Geum ‘Totally Tangerine’, Nepeta racemosa ‘Walker’s Low’, Salvia x sylvestris ‘Mainacht’ and Allium nigrum.
Use your hands or a trowel to make space for each of the plants to rest within the compost. Lightly press the edges of the plastic plant pot to carefully remove it and replant into the space you have just cleared in the compost. Level the compost around the plant until it is flush. Continue this process for all the plants you are positioning into your planter.
You are now ready to sit back and enjoy your filled planter and tidy garden for the rest of the warmer months.
Following our spring gardening tips will have your garden looking in top shape to be enjoyed throughout the summer months.