/filters:quality(75)/mediadev/media/menu-pics/menu_banner_mobile.png)
/filters:quality(75)/mediadev/media/menu-pics/all-porcelain.jpg)
/filters:quality(75)/mediadev/media/menu-pics/luxury-italian.jpg)
/filters:quality(75)/mediadev/media/menu-pics/premium-italian.jpg)
/filters:quality(75)/mediadev/media/menu-pics/budget-porcelain.jpg)
/filters:quality(75)/mediadev/media/menu-pics/large-format-porcelain.jpg)
/filters:quality(75)/mediadev/media/menu-pics/wood-effect-porcelain.jpg)
/filters:quality(75)/mediadev/media/menu-pics/porcelain-planks.jpg)
/filters:quality(75)/mediadev/media/menu-pics/porcelain-setts.jpg)
/filters:quality(75)/mediadev/media/menu-pics/browse-all-paving.jpg)
/filters:quality(75)/mediadev/media/menu-pics/driveway-paving.jpg)
/filters:quality(75)/mediadev/media/menu-pics/interior-tiles.jpg)
/filters:quality(75)/mediadev/media/menu-pics/stone-effect-porcelain.png)
/filters:quality(75)/mediadev/media/menu-pics/wood-effect-porcelain.png)
/filters:quality(75)/mediadev/media/menu-pics/grey-porcelain.png)
/filters:quality(75)/mediadev/media/menu-pics/beige-porcelain.png)
/filters:quality(75)/mediadev/media/menu-pics/dark-porcelain.png)
/filters:quality(75)/mediadev/media/menu-pics/light-porcelain.png)
/filters:quality(75)/mediadev/media/menu-pics/patio-grout.jpg)
/filters:quality(75)/mediadev/media/menu-pics/primers.jpg)
/filters:quality(75)/mediadev/media/menu-pics/porcelain-blades.jpg)
/filters:quality(75)/mediadev/media/menu-pics/pedestals.jpg)
/filters:quality(90)/mediadev/media/menu-pics/drainage.jpg)
/filters:quality(90)/mediadev/media/menu-pics/cleaners.jpg)
/filters:quality(75)/mediadev/media/menu-pics/all-stone-paving.jpg)
/filters:quality(75)/mediadev/media/menu-pics/all-sawn-paving.jpg)
/filters:quality(75)/mediadev/media/menu-pics/all-riven-paving.jpg)
/filters:quality(75)/mediadev/media/menu-pics/indian-sandstone.jpg)
/filters:quality(75)/mediadev/media/menu-pics/limestone-paving.jpg)
/filters:quality(75)/mediadev/media/menu-pics/granite-paving.jpg)
/filters:quality(75)/mediadev/media/menu-pics/slate-paving.jpg)
/filters:quality(75)/mediadev/media/menu-pics/yorkstone-paving.jpg)
/filters:quality(75)/mediadev/media/menu-pics/portland.jpg)
/filters:quality(75)/mediadev/media/menu-pics/stone-pavers.jpg)
/filters:quality(75)/mediadev/media/menu-pics/cobbles-setts.jpg)
/filters:quality(75)/mediadev/media/menu-pics/plank-paving.jpg)
/filters:quality(75)/mediadev/media/menu-pics/paving-circles.jpg)
/filters:quality(75)/mediadev/media/menu-pics/bespoke-paving-1.jpg)
/filters:quality(75)/mediadev/media/menu-pics/edging-stones-1.jpg)
/filters:quality(75)/mediadev/media/menu-pics/prestige-stone.jpg)
/filters:quality(75)/mediadev/media/menu-pics/grey-blue-stone.png)
/filters:quality(75)/mediadev/media/menu-pics/swatch-black-dark.jpg)
/filters:quality(75)/mediadev/media/menu-pics/swatch-buff-beige-white.jpg)
/filters:quality(90)/mediadev/media/menu-pics/sealants.jpg)
/filters:quality(75)/mediadev/media/menu-pics/all-clay-paving.jpg)
/filters:quality(75)/mediadev/media/menu-pics/alpha-clay-pavers.jpg)
/filters:quality(75)/mediadev/media/menu-pics/cottage-garden-clay-pavers.jpg)
/filters:quality(75)/mediadev/media/menu-pics/kessel-garden-clay-pavers.jpg)
/filters:quality(75)/mediadev/media/menu-pics/artisan-clay-pavers.jpg)
/filters:quality(75)/mediadev/media/menu-pics/grey-blue-clay-paver.png)
/filters:quality(75)/mediadev/media/menu-pics/red-brown-clay-pavers.png)
/filters:quality(75)/mediadev/media/menu-pics/beige-buff-clay-pavers.png)
/filters:quality(75)/mediadev/media/menu-pics/composite-decking.jpg)
/filters:quality(75)/mediadev/media/menu-pics/designboard-decking.jpg)
/filters:quality(75)/mediadev/media/menu-pics/classic-designboard.jpg)
/filters:quality(75)/mediadev/media/menu-pics/brushed-designboard.jpg)
/filters:quality(75)/mediadev/media/menu-pics/grooved-designboard.jpg)
/filters:quality(75)/mediadev/media/menu-pics/millboard-decking.jpg)
/filters:quality(75)/mediadev/media/menu-pics/grey-decking.jpg)
/filters:quality(75)/mediadev/media/menu-pics/black-charcoal-decking.jpg)
/filters:quality(75)/mediadev/media/menu-pics/brown-decking.jpg)
/filters:quality(75)/mediadev/media/menu-pics/all-build-deck.png)
/filters:quality(75)/mediadev/media/menu-pics/all-vertical.jpg)
/filters:quality(75)/mediadev/media/menu-pics/luxury-designclad.jpg)
/filters:quality(75)/mediadev/media/menu-pics/stone-cladding.jpg)
/filters:quality(75)/mediadev/media/menu-pics/all-garden-walling-1.jpg)
/filters:quality(75)/mediadev/media/menu-pics/facing-bricks.jpg)
/filters:quality(75)/mediadev/media/menu-pics/garden-screening.jpg)
/filters:quality(75)/mediadev/media/menu-pics/menu_Garden_banner_desk.png)
/filters:quality(75)/mediadev/media/menu-pics/all-steps-coping.jpg)
/filters:quality(75)/mediadev/media/menu-pics/stone-garden-steps.jpg)
/filters:quality(75)/mediadev/media/menu-pics/sawn-steps.jpg)
/filters:quality(75)/mediadev/media/menu-pics/riven-steps.jpg)
/filters:quality(75)/mediadev/media/menu-pics/yorkstone-steps.jpg)
/filters:quality(75)/mediadev/media/menu-pics/bespoke-steps.jpg)
/filters:quality(75)/mediadev/media/menu-pics/porcelain-steps.jpg)
/filters:quality(75)/mediadev/media/menu-pics/off-the-shelf.jpg)
/filters:quality(75)/mediadev/media/menu-pics/stone-coping.jpg)
/filters:quality(75)/mediadev/media/menu-pics/sawn-coping.jpg)
/filters:quality(75)/mediadev/media/menu-pics/riven-coping.jpg)
/filters:quality(75)/mediadev/media/menu-pics/yorkstone-coping.jpg)
/filters:quality(75)/mediadev/media/menu-pics/bespoke-coping.jpg)
/filters:quality(75)/mediadev/media/menu-pics/stone-pier-caps.jpg)
/filters:quality(75)/mediadev/media/menu-pics/porcelain-coping.jpg)
/filters:quality(75)/mediadev/media/menu-pics/all-bespoke-services.jpg)
/filters:quality(75)/mediadev/media/menu-pics/bespoke-paving-2.jpg)
/filters:quality(75)/mediadev/media/menu-pics/bespoke-steps-1.jpg)
/filters:quality(75)/mediadev/media/menu-pics/bespoke-coping-1.jpg)
/filters:quality(75)/mediadev/media/menu-pics/edge-profiles.jpg)
/filters:quality(75)/mediadev/media/menu-pics/masonry-services.jpg)
/filters:quality(75)/mediadev/media/menu-pics/deluxe-pergolas.jpg)
/filters:quality(75)/mediadev/media/menu-pics/proteus-pergolas.jpg)
/filters:quality(75)/mediadev/media/menu-pics/corten_planter_menu.png)
 Trade Discount Available
 FREE Nationwide Delivery
 Nationwide Showrooms
 Live Stock Levels
 Split Packs Available
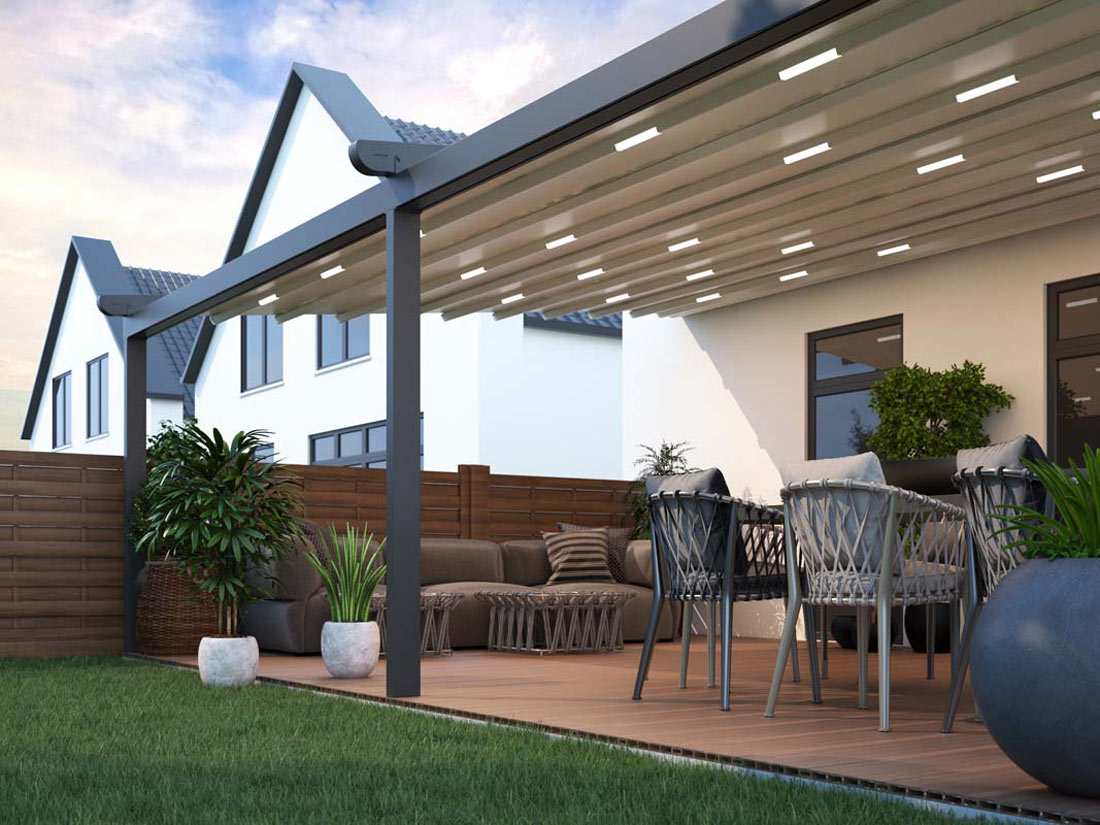
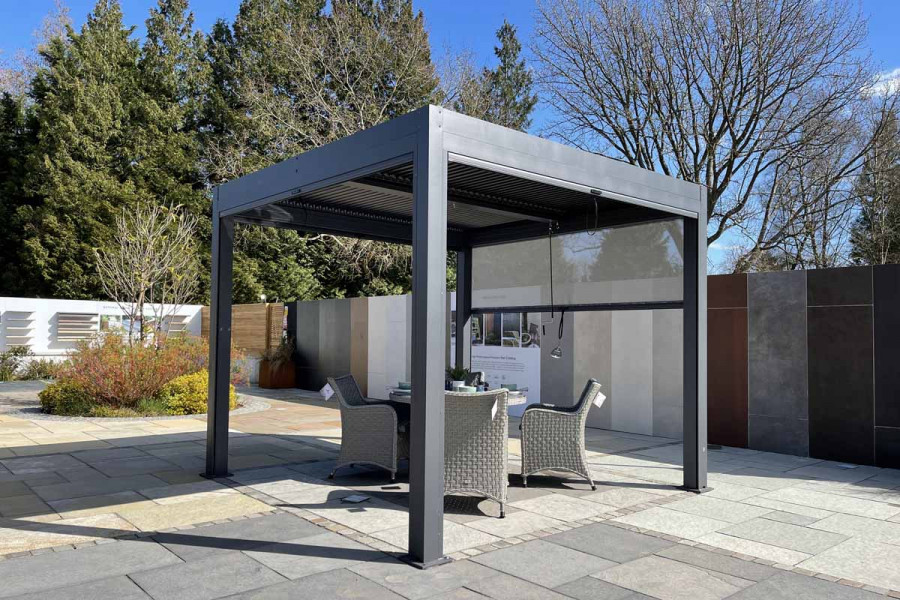
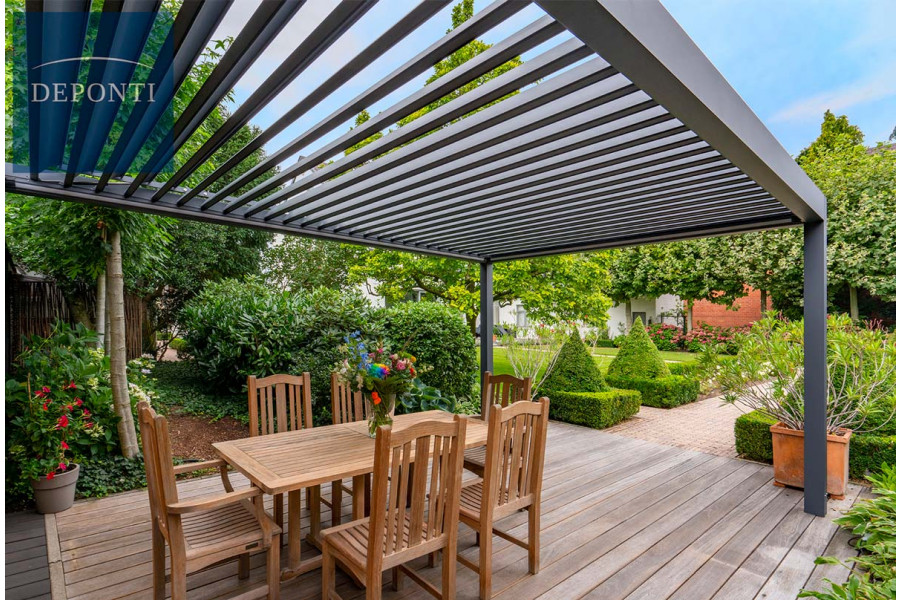
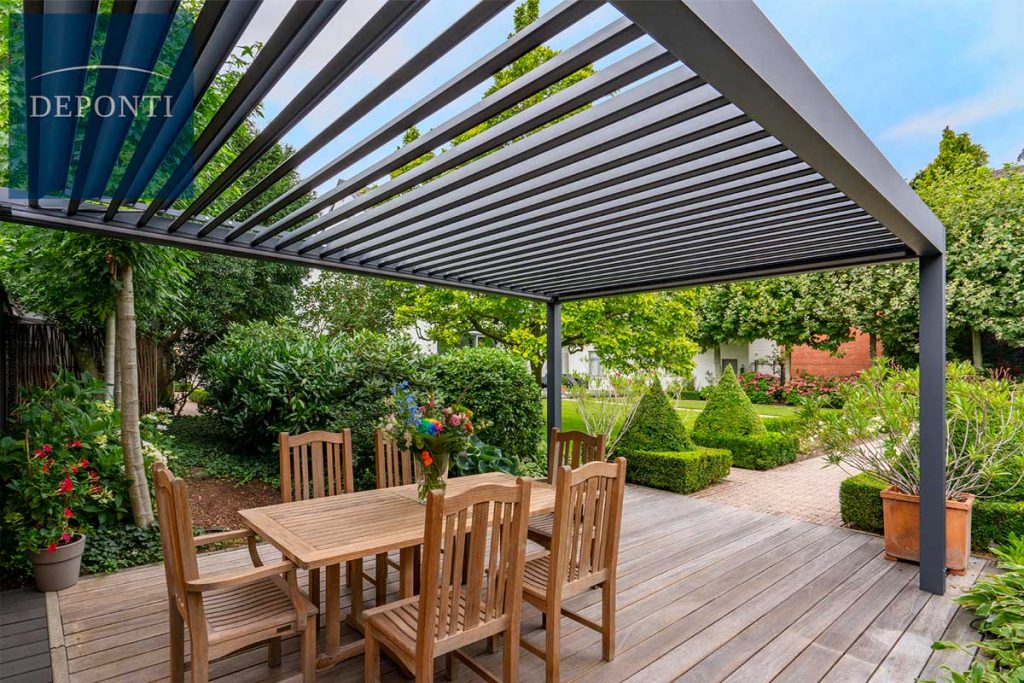
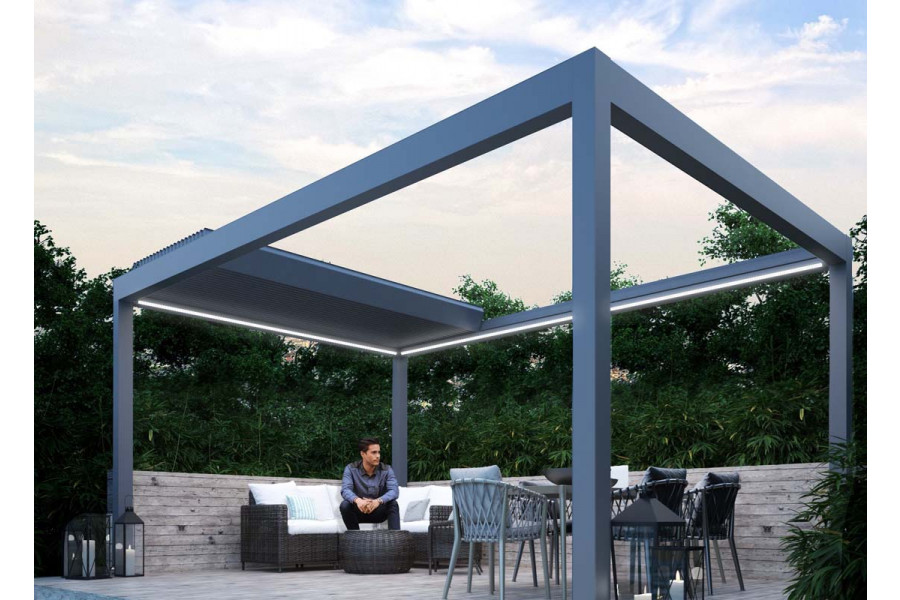
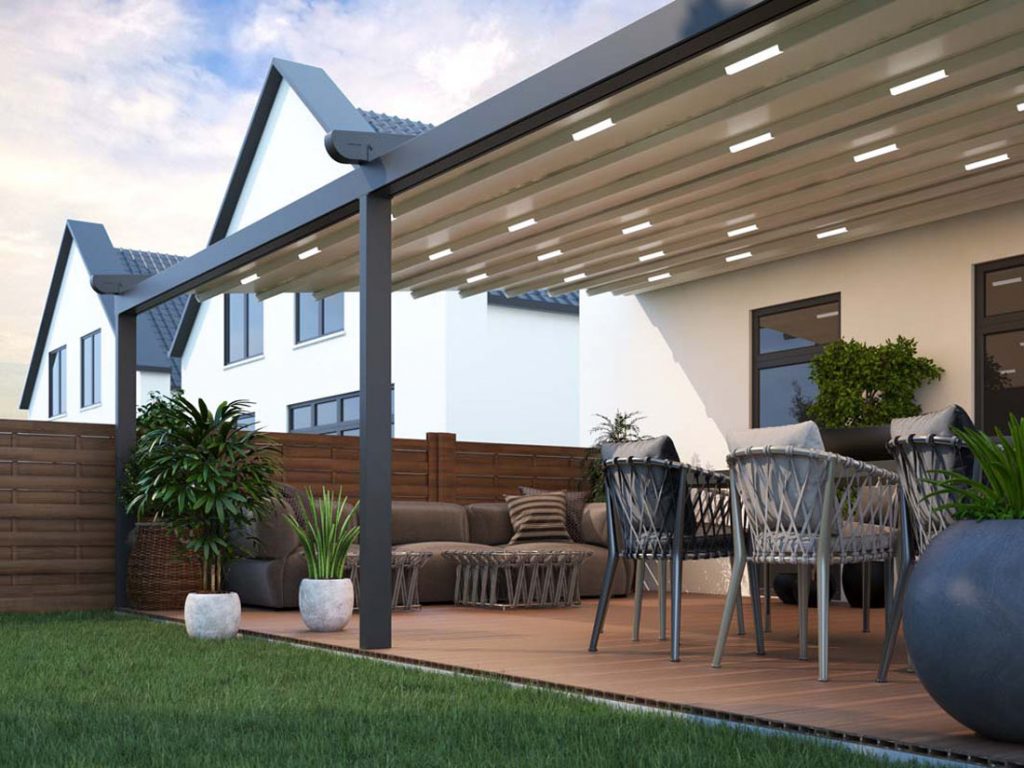
This blog was published 31st August 2021 and we no longer stock Deponti pergolas. But we do have an attractive range of other luxury metal pergolas, including the Nova Proteus range.
Adding a metal pergola to your garden is a great choice for anyone. Bringing shade, shelter, and style to your garden. We have put together this useful guide to help with installation of one of our Deponti metal pergolas.
Safety precautions and warnings
- Follow instructions and guidelines
- Assemble by at least two people
- Check delivery
- Store in dry, ventilated area
- Open packaging carefully
- Place parts on a smooth, clean surface
- Do not remove or add any parts
- Be aware of moving parts
- Cut off power supply during assembly
- Cordon off the assembly location
- Wear protective clothing (gloves, mask, safety glasses, sturdy shoes)
- Mount against a firm wall
- Do not step or walk on the panel system
- Do not tamper with bioclimatic pergola system
Preparation for assembly
Before you begin to assemble, choose a good, flat, stable surface to construct the pergola. Make sure that your assembly location is construction-ready and free of obstacles. If you are fixing your pergola to a wall, make sure that it is firm, flat, and even. When attached to a wall, make sure it has a gap of 1.5mm, per width of the pergola, between two walls to allow for expansion of the materials.
Mounting the wall profile
Define the wall-mounting bracket position on the wall and then fasten. Next, place the integrated gutter on to the wall-mounting bracket. Fasten the wall-mounting bracket cover on top and tighten. Then fix the self-drilling screws to the integrated gutter and wall-mounting bracket.
Pillar and integrated gutter connection
Decide which post you will be using for the rainwater discharge. Once you have made this decision you will need to drill a discharge hole. Place the post upright on a flat surface to determine the location hole to drill, and then drill. We recommend a diameter of 60mm. Next, fix the aluminium pillar and rear integrated gutter on both sides on the ground with M10 Sealed Nuts.
Connect the integrated gutter and lateral gutter together, then fix the lateral side integrated gutter to the rear integrated gutter with M10 Sealed Nuts. Check that the structure is level on all sides.
Panel Installation
It is now time to start installing panels. When placing the panels, start at the rear, on the motor side. Look for the short pin to identify that it is the rear panel. The panel should be installed into the pin housing, if it has not been pre-installed you will need to install it into the gutter with the housing carrier. Place the short pin into the housing and fix it with the clamp and the M5 countersunk head bolt.
Once you have fixed the short panel you can move to the next panel. The next panel is the type-3 panel. Identify this panel by a short plate, long plate, and carrier. Place the panel in front of the first panel and fasten with the M6 special bolts. In front of the panel type-3 there should be standard panels. The last panel is the panel with a locomotive carrier. Check that the housing is aligned with your projection direction. Then place the washer and fasten the nuts.
Rear mechanism house placing
Each side of the rear mechanism will have a suitable bracket. Place the front gear into the “front mechanism house”, then turn and place the stretching bolts so that each stretching bolt is placed into the related housing.
Place the tube-motor set
The tubular motor then must be set on the rear side of the pergola. The motor has a square plate that will fit exactly in the rear housing bracket. The rail belt will then go over the front and back gear, with the belt connection point being the centre of the locomotive carrier. Fasten the brackets with the stay bolt and countersunk head bolt. The rail belt can be stretched by the bolt to ensure tension on the belt is adjustable. Be sure that the belt has the same stretch level of the belt on both sides.
Finishing
You have now reached the final steps. Place the specially designed gasket into the corners. The corner cap should be on the frontside. Fix it to the housing with the M2, 9x13mm rounded head screws. Place the tubular motor covering profile. This should be on the rear and fixed with M2,9x13mm screws.
If your pergola has perimeter lighting, the lighting control box should now be placed on the profile. The cables will go from the corner to the box.
Install the rear covering profile on the motor cover profile, next install the side covering profile, then the side covering top profile. Finally, install the front over profile. All covering profiles should now be installed and the pergola finished.
Our pergolas come with installation guide upon purchase.